Pico Controller Configuration
Configuration options for any product can be found in the Configuration tab for that product in the app or on the cloud interface.
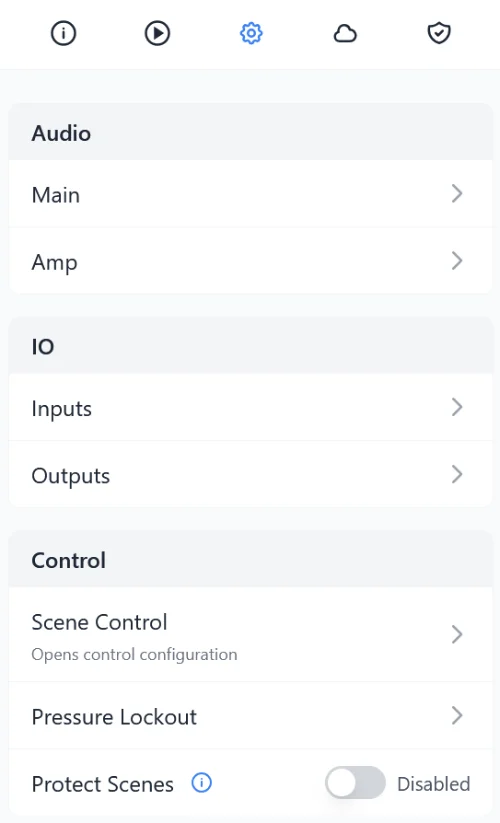
Audio
If your controller has audio, this is where you can adjust the Main and Amplifier volumes. More audio adjustments will be available in the future.
Inputs & Outputs
This is where you can label your inputs or outputs, set them to normally-closed, set minimum on-times, etc.
Input Options
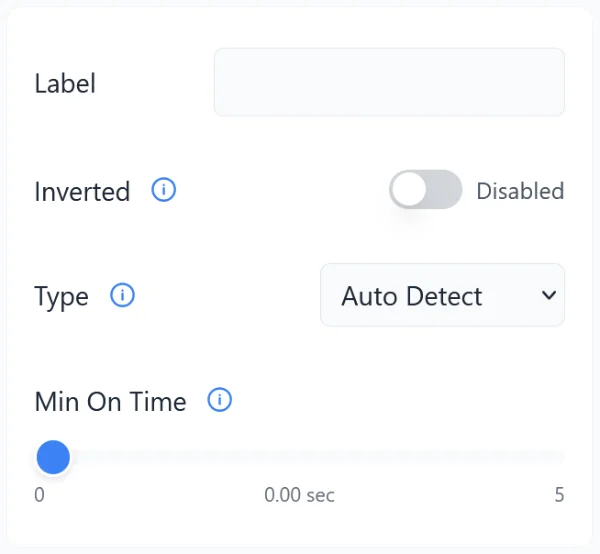
Label
If you are using multiple inputs you can label the inputs here for clarity in the future. Labels like Reset Button, Start Button, etc., could be useful.
Inverted
If the device connected to the input is outputting a signal that is the opposite of what you need you can invert it. For example, you may be using a limit switch or beam sensor that is keeping the controller's input ON and only turning it OFF when the sensor is triggered. This would cause the controller to loop unless the sensor is kept active.
Usually this can be resolved by using a different sensor output or by connecting a mode wire to + or -. That is the better approach if that's available. If not, enable this option.
Type
Here you can specify the type of sensor connected to the input. With this information the controller can more accurately estimate patron counts and ignore some sensors at start-up as they warm up.
- Auto-Detect: If the input is on at startup the controller will assume a motion sensor is connected. It will wait up to 1 minute for it to warm up before it allows triggering.
- On/Off: This mode will allow triggering or looping at startup.
- Motion Sensor: In this mode the input will be ignored at startup. The controller will arm the input once it sees the input state turn off.
Minimum On Time
Set a minimum on time if you need to filter out brief input pulses that are too short to be legitimate input signals. Common use cases include:
- Bouncy Buttons: Buttons or relays with noisy or bouncy contacts can send short trigger pulses when the button is released. These pulses are usually less than a few milliseconds. If you wanted to filter for legitimate button presses you could set this value to a quarter second.
- Interference: Wires act like antennas, picking up electrical energy flying through the air. Devices with coils like Maglocks, solenoids, relays, and motors are prime generators of this kind of noise. In some conditions this noise induces enough of a voltage to trigger an input. This noise is always very short, so adding a very short minimum on time will usually filter it out.
Output Options
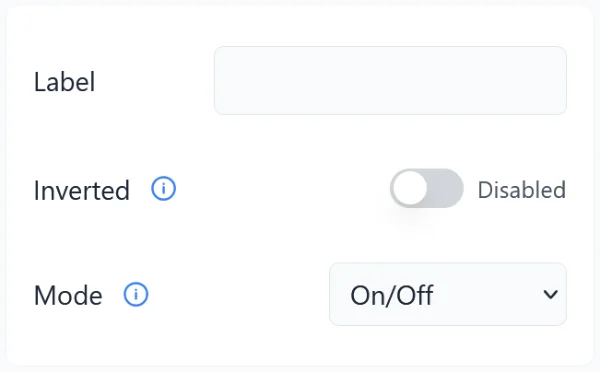
Label
If you have a lot of outputs it can be helpful to label them. These labels will show up in the real-time recording Keypad or in the Timeline Editor so you don't have to guess what output is what before animating. These can also be helpful if you need to troubleshoot remotely and you can't see what device is connected to which output.
Inverted
If you'd like the device to stay on by default and have it turn off when you activate the output during recording you can use this option. This would most often be used for lights you want on most of the time and just need to flicker off once in a while.
If you are trying to invert the position of a pneumatic cylinder it's usually best to do that by swapping the air lines connected to the A/B ports on the solenoid. Inverting it here would keep the solenoid energized all the time, causing it and the output in the controller to heat up and waste power for no reason.
Mode
By default the output will turn on when it's activated, off when it's not. If you need the output to strobe quickly to simulate a strobe light or machine gun effect you can choose one of the Strobe modes. If a strobe mode is selected, the output will strobe off and on at the selected rate whenever the output is activated.
Scene Settings
Idle Scene
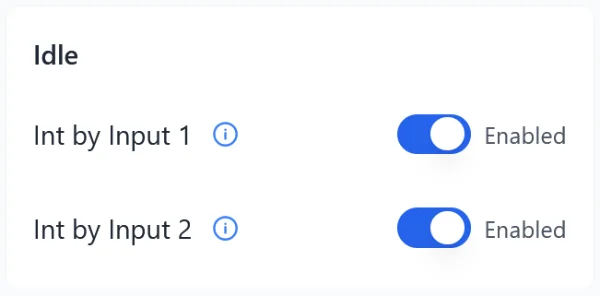
Interruptible By Input X
If you do NOT want an input to be able to trigger a scene when the controller is Idle then disable that input here. A common use case for this would be if you needed to enforce a sequence. Maybe only Input 1 is enabled in Idle, then Input 2 must be triggered from Input 1.
Input Scenes
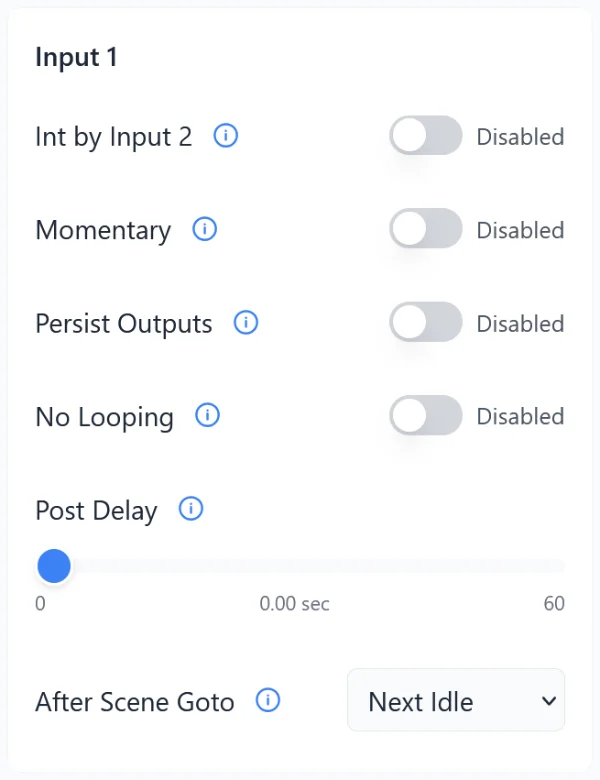
Interruptible By Input X
By default, an input scene is not interruptible by the other input.
Momentary
By default a scene will play to completion once it's been started. If you'd like the scene to only play for as long as the input is active, enable this option. This can give an operator the ability to choose when a scene starts AND stops with a single input.
Persist Outputs
If you need an output to stay on after a scene ends you can enable this option and keep that output on at the end of the scene. Any output that is on at the very last frame of the scene will stay on until another scene is triggered.
This won't work if Idle animation exists because the Idle animation will control the outputs after the scene.
No Looping
By default a scene will loop if the input that triggered it is still on when the scene finishes. If you'd like to prevent looping enable this option.
Post Delay
If you'd like to prevent a prop from activating too often you can enable a Post Delay. The Post Delay starts when the scene finishes and stops when the selected time expires. When active, the REC LED will flash yellow and trigger inputs are ignored.
After Scene Goto
By default, when a triggered scene completes the controller will return to the Idle state and start looping the Idle scene if one exists. If you would prefer the controller to jump to another scene instead, you can select that scene here.
Pressure Lockout
Pressure lockout allows you to disable pneumatic-based props if system pressure is beneath a certain threshold. See the PicoLink page for a video and information on how to set this up.
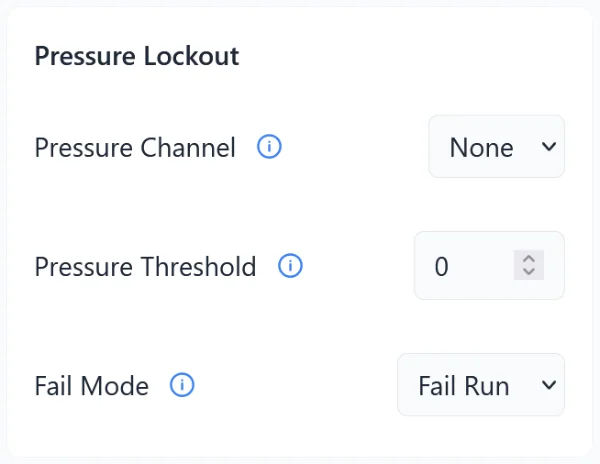
Pressure Channel
Large systems may have multiple pressure sensors. Each pressure sensor must publish its pressure to a dedicated channel. Any number of devices can tune in to a particular pressure sensor by subscribing to its channel.
Pressure Threshold
The prop will ignore its inputs below this pressure.
Fail Mode
If for some reason the controller is no longer receiving pressure data from the sensor what should it do?
- Fail Run: Assume pressure is good and run anyway.
- Fail Safe: Disable the inputs. Only allow triggering if we have confirmation pressure is above our threshold.
Write Protection
You can enable write-protection by toggling the Protect Scenes toggle at the bottom of the configuration tab (see above). This will disable the record button on the unit and even prevent animation / sound changes in the app.
This is currently the one setting that can also be toggled with the buttons on the unit. To toggle write-protection on the unit itself:
- Power up holding the 2 button.
- After a second or two the status LED will turn solid (see below).
- Let go of button 2.
| LED | Color | Protection State |
|---|---|---|
| Red | Disabled (Recording OK) | |
| Green | Enabled (Recording Blocked) |